
Evan Edwards
Technical Artist
As a capstone project for my program at Michigan State, I worked on a procedural Skybox shader in Unity. I used ShaderForge (a node-based shader editor for Unity) for the shader, and Substance Designer for the clouds and stars. Below is a breakdown of my node setup and how it all works.

UV Space

Skyboxes don't really have UV space, but fortunately you can map colors using the world position of the pixels. Normalizing them places them in a nice sphere around the viewer, and I can mask this out later to grab any axis I need.
Sun

This part is actually some really basic code that comes with ShaderForge's skybox implementation. Basically it just tracks the position of the sun based on the inverse of the light direction, uses a couple user inputted values to map a radius, then multiplies it by the color of the sun accordingly.
Sky Color

Here I just used the dot product of the light direction and a down vector to see when the sun was highest and lowest in the sky. It's clamped so that the night color doesn't fade in even when the sun is below the horizon. The lerp node sets the starting colors for the sky. I also take the absolute value of that dot product and subtract it from 1 so that I can get a picture of when the sun is at the horizon.
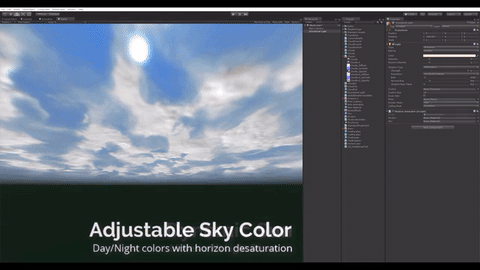
Desaturation

I use the normalized world position from earlier to mask out the verticality of the skybox, then remap it so I get a value of 1 at the horizon. I used that to calculate appropriate values to desaturate and brighten the sky closer to the horizon. I multiply it by a user inputted desaturation amount, soften it with the power node, then slightly desaturate the previously calculated sky color. I also grab a user inputted brightness and just add that to the desaturated color. Not pictured above, but then the desaturated and non-desaturated versions are lerped at the horizon.
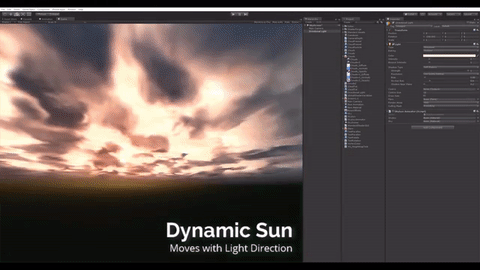
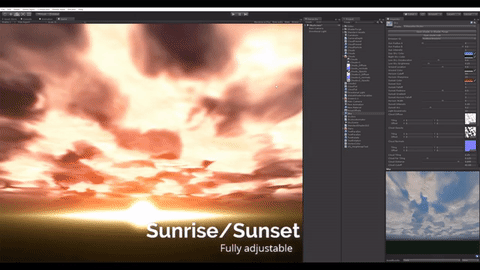
Sunset

This bit has a lot of pieces to it. Starting in the top left, I create a reddened version of the light color to simulate atmospheric scattering at the horizon. I take a user input, reduce the amount of green based on it, and reduce the amount of blue by twice as much. I grab a large circular radius for where the sunset should be based on its position in the sky, and give user inputs to edit the gradient and the size of the sunset. I then stick that on top of the desaturated sky based on when the sun is at a certain point on the horizon.
Ground

Basically all this section is doing is creating a ground hemisphere for the skybox and setting the point for the horizon based on user input for where the ground should go. It masks out the ground by using the verticality of the skybox plus the ground location and then allowing user input for the falloff. The horizon uses a similar technique, except instead using the absolute value to grab just the middle of the skybox (based on the ground location) and then using a user input to control the softness.
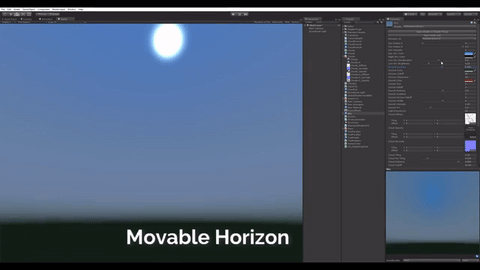
Horizon

There's a lot of fun with numbers here, so I won't get too much into the nitty-gritty. The bottom part basically combines the ground calculation with the sun direction to mask the horizon in a radius around the sun when it approaches the horizon. The middle part creates the falloff on the horizon around the sun so that the highlight only exists around the sun itself (and actually arcs a little bit). And the top gives the user control so they can actually edit the size of the sunset. These are multiplied together, then combined with the light color to color the horizon.
Stars

A few of these tricks I found on ShaderForge's documentation on procedural skyboxes. Dividing the rb channels of the world position by the g channel let's us get a good spherical mapping at the top of the skybox. We add some user inputted values to this so that the user can offset the stars and move them across the sky during runtime. These UV's plug into a stars texture which are masked to the top of the skybox and "soft-added" to the skybox (which is basically just multiplying them by the color before officially adding them so there is some nice edge coloring to the stars). The stars texture is procedurally generated in Substance Designer using a few splatter nodes, with values exposed for the user to mess with.

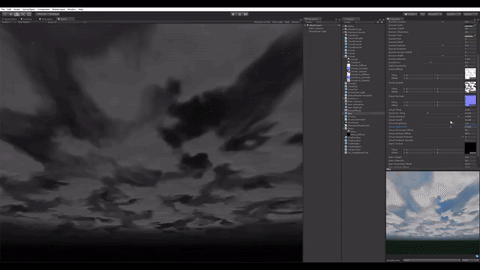
Clouds

The clouds for this Skybox are all procedurally generated using a Substance Designer graph, and implemented in the shader using a diffuse, opacity, and normal map. The substance file is exposed to the user to tweak the clouds to their specifications. The clouds are by far the most complex part of the node setup, so I broke this section up into parts.
1. This sets up the masking so the clouds don't dip below the horizon. The user can control how far down the clouds extend and the falloff at which they fade out.
2. This is UV manipulation similar to what we did with the stars. We set it up so that the clouds map correctly across the top of the sky (yet still look like a flat layer), and also stretch as they approach the horizon. The user can control the stretching, tiling, and offset of the clouds to manipulate and move them during runtime. These UV's are passed into a diffuse, normal , and opacity map for the clouds.
3. This section handles all of the coloring for the clouds. At the top, we give the user the option to simply mess around with the cloud brightness and color. We use a dot product on the normal map and an upwards vector to simulate light scattering and illuminating the clouds from below. We handle the lighting for the clouds differently at night, where the user can also control how dark they want the clouds to get. Same thing with sunrise/sunest - we use the reddened version of the light color from earlier and remap the colors. We then lerp these cloud colors in almost the same way we lerped the sky colors based on the position of the sun.
4. We use the red values of the opacity map to mask out the diffuse map so that we don't have black spots in our clouds. They're overlayed on top of everything else in our skybox so far.

Dithering

This last bit is another trick I picked up from the Shaderforge documentation. This effect is basically dithering to mask some of the impurities of the substance designer materials. We use noise that is multiplied very subtly over top of our skybox to give it a little bit of texture.